
Introduction: From a simple question to a precise investigation
Welcome to the second part of our journey into the world of SQL. In the previous lesson, we took the most important first step: we learned how to ask a database to show us the contents of its "binders" using SELECT and FROM. We displayed entire tables or selected columns.
Today, we'll go a step further. In karate, it's not just about striking, but about hitting a specific point. In SQL, it's not just about seeing the data, but about seeing exactly the data we need. We will learn the art of filtering, and then we will do something truly powerful—combine information from two different tables.
Part 1: WHERE – Your data filter
Imagine that our Customers table from the last lesson has thousands of entries. Displaying all of them is pointless if we're only interested in one specific customer or customers from a single city.
This is exactly what the WHERE clause is for. It's a condition that the data must meet to be displayed. It's like telling your assistant, "Show me the list of customers, but only those who are from London."
Let's go back to our online tool: SQL Tryit Editor – W3Schools
Remember our last query? SELECT * FROM Customers;
Now let's add a condition to it. We want to see customers only from London. We'll do it like this:
SQL
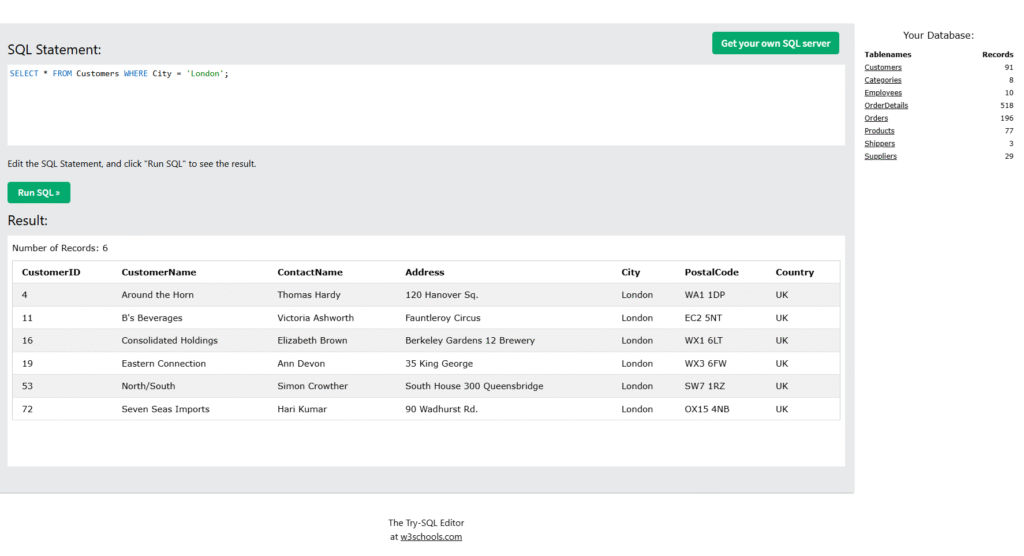
SELECT * FROM Customers WHERE City = 'London';
Run this query. See what happened? The list has been filtered. You only see the rows where the City column has the value London.
Breaking it down:
WHERE– this keyword starts the condition block. We always write it afterFROM.City = 'London'– this is our condition. It consists of three parts:- The column name (
City) that we are checking. - The comparison operator (
=), in this case, "is equal to." - The value we are comparing against ('London').
- The column name (
Important note: Notice that I placed the text 'London' in single quotes (' '). In SQL, every piece of text (called a string) must be marked this way. Numbers, however, are written without quotes.
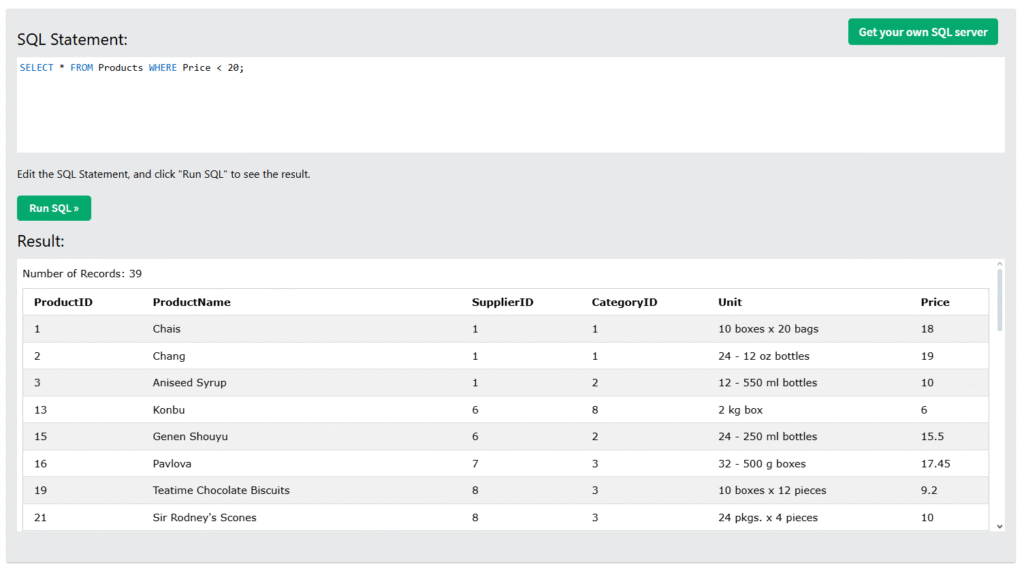
Let's test this on the Products table. Let's find products that cost less than 20:
SQL
SELECT * FROM Products WHERE Price < 20;
Simple, right? You can use various operators:
=– equals>– greater than<– less than>=– greater than or equal to<=– less than or equal to<>– not equal to
Practice on your own: Try to find employees (Employees) who have an EmployeeID greater than 5.
But that's not all. Those operators are mathematical. If you want to search for text data and select, say, all cities that start with or contain certain text, you use the LIKE operator.
SQL
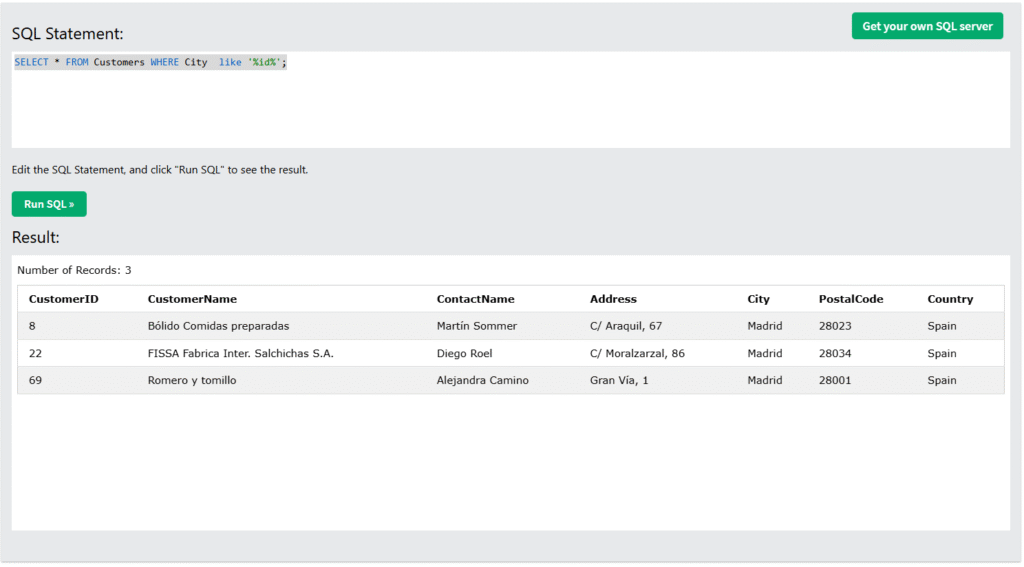
SELECT * FROM Customers WHERE City LIKE '%id%';
The query above will find all cities where the word contains id, and the percent sign (%) means any other characters of any length.
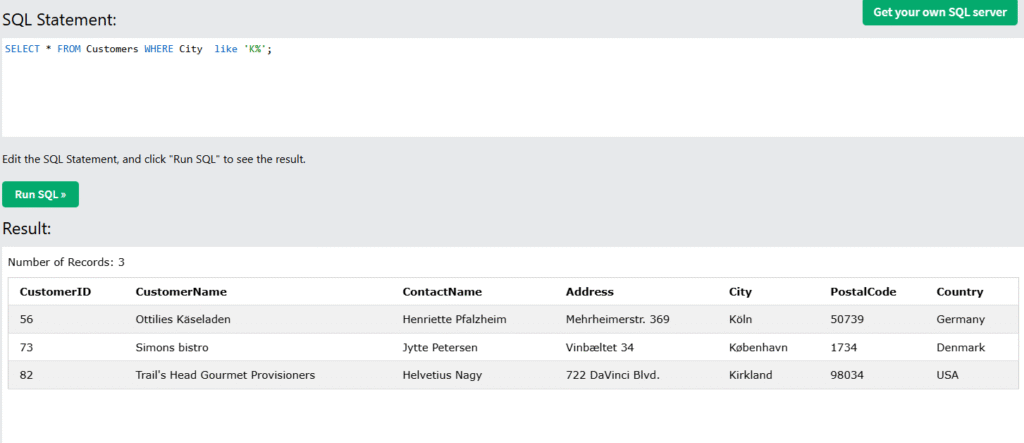
What if we want cities starting with the letter K? City LIKE 'K%'
And ending with K? LIKE '%k'

You will be using WHERE (=, <, <=, >, >=, <>) and LIKE very often!
Part 2: JOIN – When one binder is not enough
So far, we've been working within a single table—a single "binder." This is convenient, but in reality, data is often related and stored in different places. What connects these sheets in different binders are the relationships between them.
THAT'S WHY THESE DATABASES ARE CALLED RELATIONAL!
Let's imagine a simple scenario: We have a Customers binder and a separate Orders binder. The Orders binder records who placed an order, but only using the customer's ID number (CustomerID). The full name of that customer is in the Customers binder.
Complicated? Not so much, take a look:
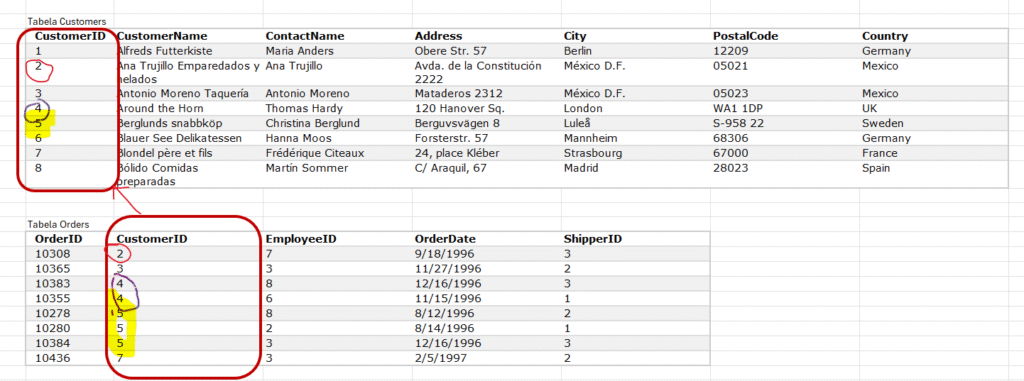
[Image showing that the Orders table has a CustomerID which links to the unique ID in the Customers table]
In the orders, I have a number that points to a customer. That's their ID, a unique number. Each record, or row in a database, usually has such a unique value. And here we have a relationship where one customer has many orders. The one with number 2 has one on this list, but number 4 has two orders, and number 5 has as many as three.
What if we want to see a list of orders, but next to each order number, we want to see the full name of the customer, not just their ID? We need to look into both binders at the same time.
This is what JOIN is for.
Let's see how it looks in practice. We want to display the order number (OrderID) from the Orders table and the customer's name (CustomerName) from the Customers table.
SQL
SELECT Orders.OrderID, Orders.OrderDate, Customers.CustomerName
FROM Orders
INNER JOIN Customers ON Orders.CustomerID = Customers.CustomerID;
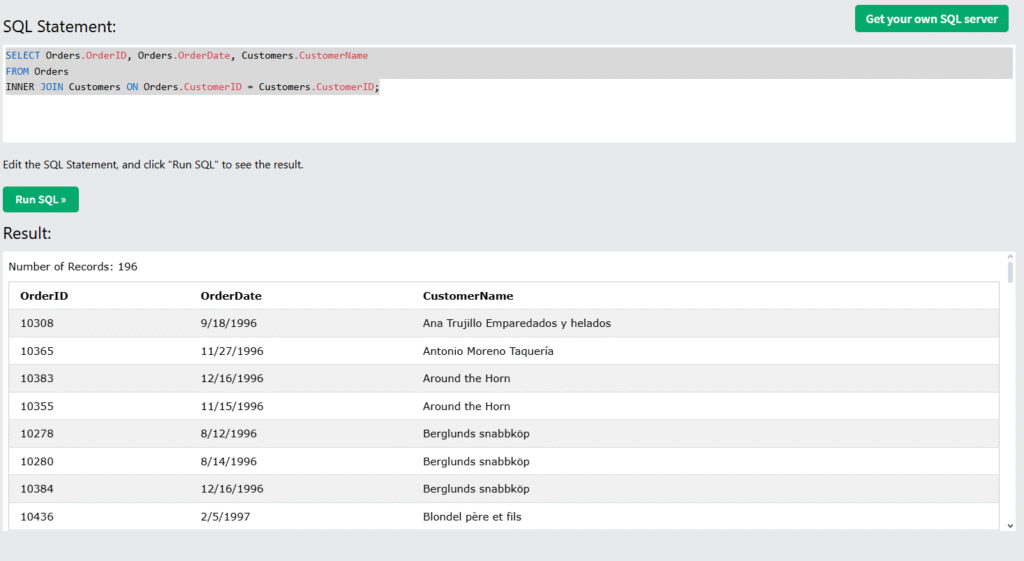
Run this query. The result might surprise you. We've received a new, virtual table with columns that come from two different sources!
And now you're probably asking me, what is this INNER thing?
For now, just to not go too fast, know that the W3Schools tool uses a very simple and old database where some things have to be written out explicitly. INNER is a type of join between two tables that is the default in all modern databases, where you just write JOIN. So in MS SQL, PostgreSQL, ORACLE, MYSQL, and even SQLite, you don't have to write INNER before JOIN 🙂
Let's break down this powerful command calmly:
SELECT Orders.OrderID, Orders.OrderDate, Customers.CustomerName We're stating what we want to see. Since we are taking data from two tables, we need to specify which column from which table we mean (TableName.ColumnName). (PS. You can, and even should, simplify this, but more on that later).
FROM Orders We start with our main table, which is Orders.
INNER JOIN Customers We tell SQL: "And now, join the data from the Customers table to this."
ON Orders.CustomerID = Customers.CustomerID This is the most important part. This is the joining instruction. We are saying: "Connect a row from the Orders table with a row from the Customers table ONLY IF the value in the CustomerID column is identical in both rows." Without this, all columns from one table would be joined with all columns from the other, and it would be a disaster.
JOIN can seem complicated at first. That's normal. The most important thing is to understand the concept: we are looking for a common connection point (a key) between two tables to be able to combine the information they contain.
Summary and today's task
Today, we have mastered two incredibly powerful concepts:
- Filtering data with
WHEREto find exactly what we're looking for. - Joining tables with
JOIN...ONto draw information from multiple sources at once.
These are the foundations upon which 90% of daily work with data is based.
Your task for today: Using the knowledge you've gained, try to write a query that displays the names of products (ProductName) and the names of the suppliers (SupplierName) who provide them. Hint: the tables you'll need are Products and Suppliers. What column might be their common "key"?
Let me know how you did in the comments!
0 Comments